Jan 23, 2016

Exercise BINGO

Our library uses the Collaborative Summer Reading Program every year, last year's theme was Be a Hero Read. We partnered with the Mayo Clinic Health Systems and our Friends of the Library to offer an exercise BINGO sheet for kids to finish and earn raffle tickets for an end of the summer prize drawing, a hacky sack when they picked up the form and a free water bottle upon completion.

We had two new Story Walks set up in our town, one at a local park and one at our local school's nature walk. We included the Story Walk on the BINGO sheet as a way to promote it's existence.

This side program (with hardly any staff work) was a great success for our small library (Res Pop 3500). We had 126 kids pick up the BINGO sheets (tracked by the number of balls we gave away) and 44 kids returned them completed. AND this summer's theme is On Your Mark, Get Set, Read! which makes this BINGO sheet extra awesome because we will be partnering with the Mayo Clinic Health Systems and holding it again.


Dec 2, 2015

The, the, the, the. . . the Grinch!

December library display poster for the children's books. . . 

feels a bit like Seuss blasphemy. 

Have a very happy holiday season.

Sep 30, 2015

Back to School


Had to share my Pete the Cat bulletin board. We always have a calendar with our events, but our calendar needed some sprucing up this month so, I added Pete. Then I saw a post with
school jokes and added the jokes.

Sep 24, 2015

Homeschool Club, 3rd Edition

First day back with the Homeschool Club today, and I had 27 kiddos (huge for our library).

Two years ago, I worked with a local co-op to establish goals and the purpose of the group.

1. Get kids used to public speaking.
2. Give kids opportunities to work in groups (who aren't siblings).
3. Kids work with a different adult.

We have been meeting during the school year once a month for an hour.

What went down:

We started with a getting to know you game: on the way into the meeting room, kids were given toilet paper and told, "Take as much as you think you will need."  That was it, no further instructions. After all the kids had their toilet paper, I took 4 squares myself and started off by touching each square one at a time as I made statements:
1. My name is Kathy.
2. I work at the library.
3. I like to watch mysteries on TV.
4. I like to play volleyball.

One of the older kids had already played the game before, he had taken 6 squares and wanted to go next. After he went, I had the kids guess what the toilet paper was for before we had everyone else go. When some stragglers came in, the kids went wild suggesting the late comers take a lot or a little (got a little loud for a moment).

The kids all cooperated beautifully, even the kid who took 37 squares!

For each kid the first square was to say their name, and I would have the group repeat the name back to me. If they stopped listening, I would just ask them the last thing the kid said, "Did anyone hear what restaurant John likes to visit?" Occasionally I had to prompt kids, what do you like to do outside, what's your favorite color, etc,. This game took A LOT longer than I had anticipated, we were left with about 20  minutes.

I had the Alike, Different sheet ready as a back up activity to the main activity (that we never even got to), so I used it for the back up activity to the ice breaker!
We finished with the same and different game. The kids had to find 5 other kiddos and write something they had in common in the circle, and something that was different outside the bubble. The younger kids had a harder time with this activity (4 & 5 year olds) because they couldn't write/spell or were reluctant to do so, but between myself and some of the older kids, we got their sheets completed for them. This was great for working on initiating a conversation with people, you wouldn't believe how hard this is for kids. I had the opportunity to model for them A LOT! Incentive to finish the sheet: they could go when it was full.

Here's the blank sheet:

Aug 3, 2015

Picture Book Organization- Nature


Nature seemed like a natural category to have, with seasons and weather. I ended up with a few other subcategories. I ended up splitting food and plants up. Pizza isn't really a plant, but it is from nature, so. . . food! Creepy carrots could go in either, but since it wasn't really about growing carrots, and more about eating carrots it ended up in NATURE FOOD REYNOLDS.

These are the subcategories I used for Nature

Camping- we live in a touristy camping area.
Conservation- small, small section, but when Earth Day comes around they are easier to find.
Food-  food we eat, including plants that are being eaten or put in soups or on pizza.
Nature- water cycle, random nature love books, anything that doesn't fit into the other sub-categories.
Plants- Growing and harvesting go here, trees, flowers, and books about gardening.
Seasons- spring, summer, fall and winter are all here.
Weather- rain, wind, storms, tornadoes and other weather related books go in this section.

So where do those pesky apple books go? Seasons, food, plants? That is what I love about this organization system so much, it is flexible. If the book is not going out in seasons, I move it to food, or plants.

Jun 24, 2015

Super Hero Training Academy (Library Version)

Most of my programs are drop in, finish the activities as you wish, hopefully check out some cool books and go home.  Super hero training academy was no exception.When the kids came in they got a check list with all the activities. Their mission? Complete the checklist.
Station One: Generate your superhero name and create a badge.
Patterns from here and here. The names were goofy and involved food. Some kids did not think having a cute name like the Invincible Marshmallow was very cool, so they made up their own.
Station Two: Knock over the villains with Captain America's Shield
This could have been so much bigger. Kids love stacking cups and knocking them down and stacking them again. This idea was on several different websites.
Station Three: My ABSOLUTE favorite.

Krytonite Keeper came from a few different ideas I saw online. One was a lava trail made out of LEGOs and the other was a radioactive orange game our teen librarian did with the teens the day before. The teens had an orange on a spoon and they had to knock off other kid's oranges to win while staying in a circle on the floor. I did not want to do this with the younger kiddos. I also loved the idea of walking across hot lava which was actually LEGO. Krytonite Keeper is "walking across crushed buildings to save Superman from the Kryptonite". This was totally awesome. Barefoot, spray your LEGOs later with some disinfectant spray. I used three tubs of LEGOs from our LEGO Club.
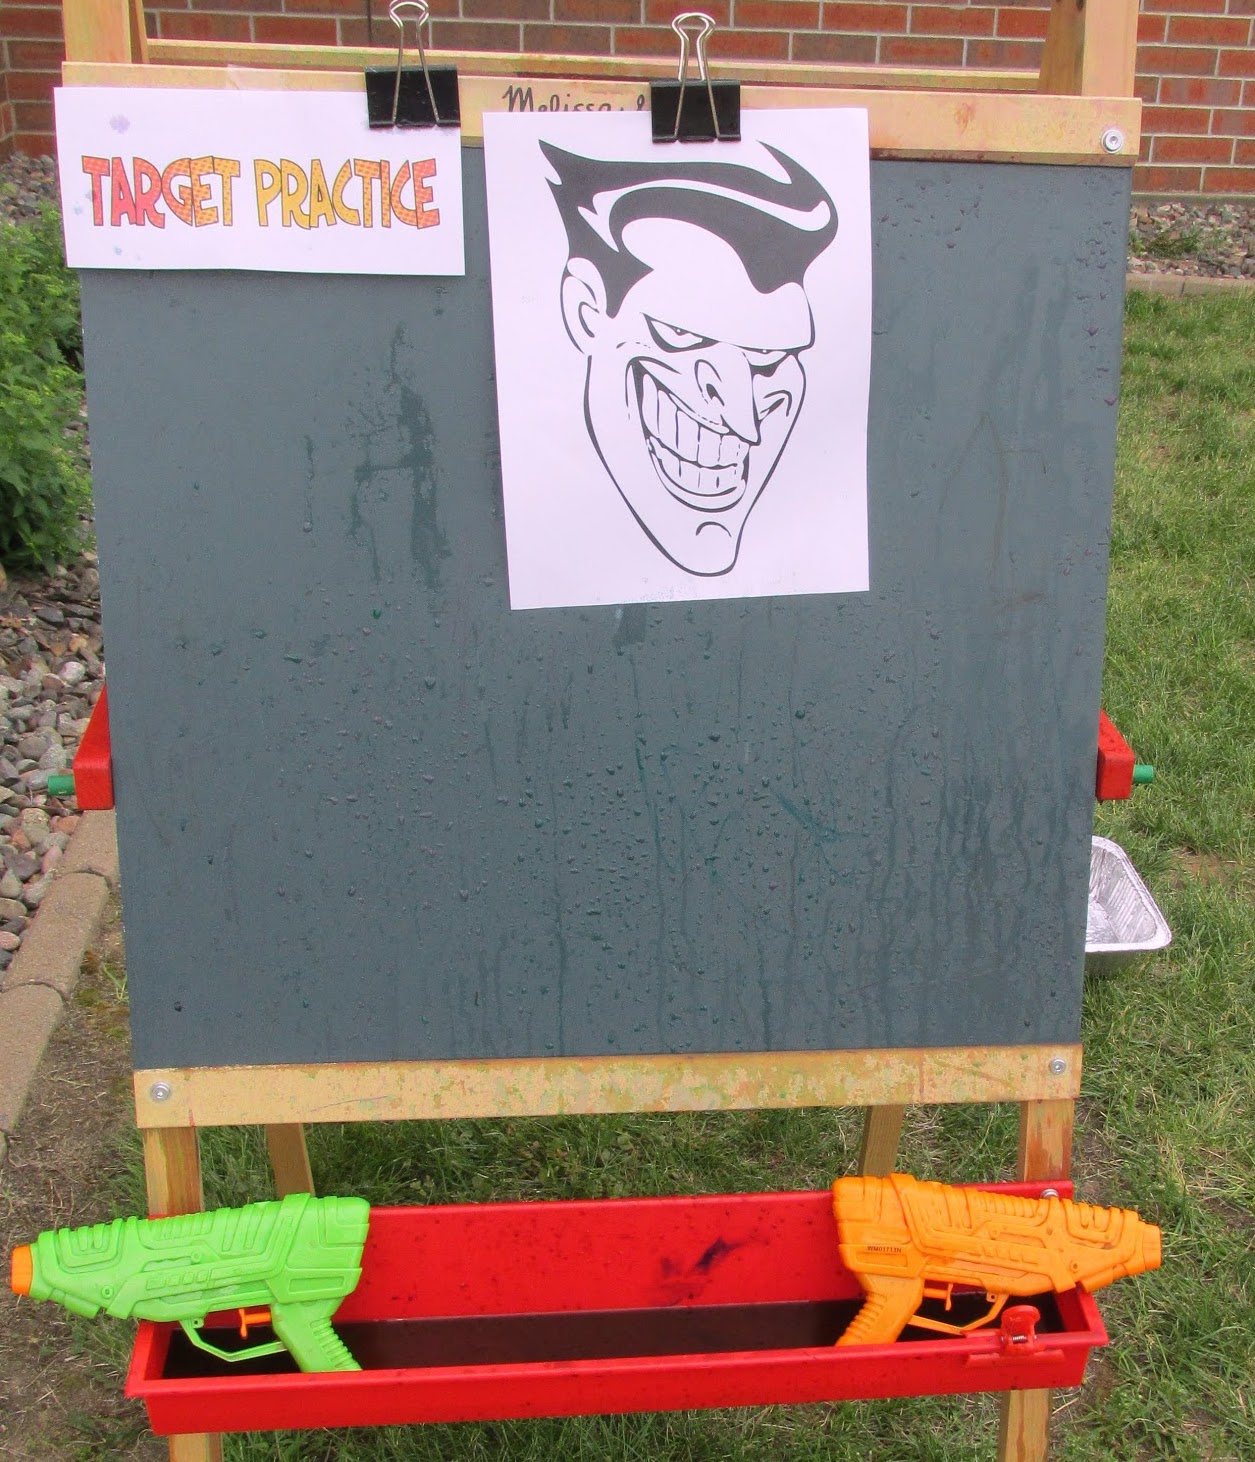
Station Four: Shoot the villain with water guns filled with paint.

Another Pinterest find that I tweaked for super hero training. This would have worked better if the water guns didn't leak all over the place. I filled the guns with a paint/water mixture.One gun had purple paint, one had green.
BEST SUMMER READING PICTURE EVER!
Station Five: Web Spinning, a crafty project, you can't see it but this table is full of girls.

Station Six: Leap over a building like Superman
I found the idea for the building jumping with another link on Pinterest. I wrapped different sizes of boxes and used label stickers for the windows. The kids came back to this activity over and over.

This program cost $4.22 for the red plates and the Frisbee at the Dollar Store. I used a lot of stuff I had left from other programs (I am a hoarder at work). I had almost 40 people show up (over 20 is excellent for our small library)!

Jun 22, 2015

Penguins and Process Art

Penguin storytime! I love penguins, who doesn't?

The kids really seemed to enjoy the farting penguin. . .
I rarely do cute product oriented art with preschoolers, but I know that parents value cute art projects to stick on their refrigerators, so I came up with this project that I think everyone can enjoy! 

I cut out the black part of the penguin and taped it to black paper and let the kids paint their papers with feathers and white paint. When the paper was peeled off, the kids were left with a penguin. They had a lot of fun with this one, because they got to cover the entire paper if they wanted. Of course some had a hard time with that (think color in the lines), but the end result was a cute project the parents could enjoy as well. This is also a great art lesson about negative space, so parents can feel good about that as well if you even bring it up.

Painting with Feathers
End "cute" project.

We played March of the Penguins between books; as I waddled with the kids, we sang this penguin call and response chant (I found it helpful that parents stay at storytime and were familiar with a call and response chant). We sang it through twice.


I'm a penguin black and white
I can't fly but that's all right.
I've got feathers that's not fur.
I lay eggs like other birds.

"Now we are going to do some counting" (in time with marching)

CHORUS
Penguins, 1, 2 (make dramatic finger counting gestures)
Penguins, 3, 4
Penguins, 5, 6, 7, 8
Penguins, they're great!

I swim real fast to get my meals.
I watch out for leopard seals.
I'm from the south as you may know
Now it's time for me to go.

CHORUS
 

Jun 11, 2015

Kryptonite Krispies in a Cup

I got the idea for the Kryptonite Krispies here.

I saw the picture and knew it would be an easy snack to add to our school age crafting program (I always try to add an edible crafty snack).

What you need:
  • One large styrofoam cup per kid (a bowl might work better, our cups tipped over sometimes)
  • 4 big marshmallows
  • 1/4 tbsp butter
  • 2/3 C of Rice Krispies (or the generic kind is definitely cheaper, one box was enough for about 20 kids)
  • Green & Yellow Food coloring, 1-2 drops per cup


I had the kids put the marshmallows in the cup, a volunteer portioned out the butter for them and they added that to the cup as well. Microwave for about 12-18 seconds depending on how fast your microwave melts stuff. The volunteer handing out the butter also supervised the food coloring drops when the kids added them. Stir with a fork, and eat with same fork. Super easy, super quick. I'm sure you could modify with Fruity Pebbles or other such cereal. I can't wait to modify this and use it again.

May 22, 2015

SRP Sweetness

I used the fabulous library hero signs created on the Hafuboti blog to make
Mini Candy Bar Wrappers. 

 
If you want to print them for yourself, you will have to download them as a PDF for it to print correctly, I'm not sure what's up with that. But these are going to make SWEET prizes at our SRP Kick Off Carnival!

Also, if you want some Super Awesome Capes to jazz up your suckers, check out this Blog.

Let the Summer Begin!

Apr 8, 2015

Yellow've These Books

"Why do you like colors so much?" asks my daily favorite 10 year old library guest. To which I say, "Who doesn't???"

I loved the green Ispy last month so much that I turned it into a yellow display. I love yellow. Sunshine yellow.

Mar 19, 2015

It's Not Easy

It's not easy being green, or a library director! I've been avoiding posting for several reasons. One I've been a slacker and haven't posted much at all lately, I have guilt over this. Why? I have no idea. Two I feel like a whiner for even complaining a little about my new job title. A year ago this month, I added Library Director to my job duties and kept the ones I already had. Needless to say, there was a long, long, long period of teaching an old dog new tricks and I'm still learning everyday. I also had to learn to balance my two duties. One of the things I have lost is time. Time to take pictures of all the fun stuff I do, time to stop and write up a reflection (which NEEDS to be done for the next time I run a similar program). So there it is, my explanation of why this blog sucks now.

I lost my partner in crime, my old boss/director. We used to have so much fun putting displays together. We were great at bouncing ideas off each other and a great creative team ( I MISS YOU KIM!!!!). I was thinking about her and missed doing fun displays, so I took some time to put this display together. I found the idea for this display on Pinterest. I started out making an ispy poster, adding little pictures around the main poster. When I put the poster up and all of the books, I was at a loss for what to put on the top... I found the grinch, then I made him a green cage out of building straws, and set him on the top. He was lonely, so I started to round up anything green we had in the storytime closet and made up a small ISpy poster for the sides of the display.


Sep 8, 2014

Mad Scientists Take Two (Balloons & Electricity)

This book totally became my go to for science projects at the library. 
All of the experiments I used in this program came from this book!
Supplies:
Balloons, Plastic Cups, Hex Nuts (of various sizes), 1 Fluorescent Light Bulb, Lemon Juice, Paper Towel, Nickels & Pennies, and bowls for the water. 

The Experiments:

1. Balloons and Air Pressure Challenge. Found on page 134. Each table has a bowl of water, a few balloons and a bunch of cups. I used one balloon per kid and about 15 cups per table (the successful tables needed more cups). I first asked the kids how many cups they thought we could get to stick to a balloon, and I showed them how I could stick one cup to the balloon. Process: After one child blows up the balloon to about grapefruit size, another child dips the top of 2 plastic cups in water and then uses the surface tension to hold the cups to the balloon. The first child blows more air into the balloon, the air pressure inside the cups changes so the cups stick to the balloon. Pause for more cups, and keep blowing and sticking cups on as long as you can. The challenge was to get over 10 cups on a balloon and one group of kids did it!


2. Balloon Banshee. Found on page 182. Each child has a balloon and a hex nut. I challenged the kids to make noise with their balloons using both of the items. Eventually one of the kids figured it out: put the hex nut inside the balloon and use two hands to get it spinning along the inside of the balloon. As the sides of the nut hit the inside of the balloon, they make a vibration. The faster you can get the nut going around inside the balloon, the more constant the sound is until it sounds like a very annoying banshee. I went around and blew up balloons for kids who couldn't and stuck a nut in and tied it off. Each child got to take one of these fun noise makers home with them!

3. Light a Lightbulb using a Balloon. Found on page 200. Can it be done? First we tried rubbing the balloon on a kids head. Rub and have the kids sing a fun song like the ABC's (it's corny, but they'll do it). Turn off the lights (have a helper do that), stick the balloon to the end of the bulb. We didn't get it to work, we tried it again and sang the ABC's backwards, still didn't work. I had some wool yarn, we tried that and I had the kids count by 5's to 100 as we rubbed. We were able to get a short spark out of the light bulb! The kids came up with different scenarios that we tried out to get the light bulb to light up with the balloon.

That was the transition for building a battery out of money (electricity)

Can we make electricity with money?

4 (& 5). Penny & Nickel Battery. Found on page 192 (I had to wait for the book to come back to the library to find out the correct number of coins for this post). Each table had a small cup of lemon juice, paper towel squares cut into 1" squares, a few sheets of paper towel to lessen saturation levels, and 6 of each clean pennies and nickels (cleaned the night before).

Waaaay back at the beginning we had put the money into different bowls of water: one with soap, one with salt, one with lemon juice and one with vinegar and made predictions about which would be the cleanest (it didn't work how it was supposed to, but that was okay it's more about making predictions and testing them out). The kids all looked at the money to determine the results. As they came up to look, one rep from each table took back 6 of each: pennies and nickels. Then they worked on creating their batteries.

When the paper towel is dipped in the lemon juice and placed between the pattern penny, nickel, penny, a slight charge will be created when you hold each end of the "wet-cell battery". Some of the tables got it to work, and some didn't. We predicted it was because of the amount of moisture on the paper towel squares, but ran out of time to test our hypothesis!


Jul 9, 2014

Picture Book Reorganization One Year Later

It has been a little over a year since we reorganized our chidren's picture books into their own scheme.

It has been a year of learning and a few changes. . .

Added general sub-categories
I had previously left a general book on a topic without a sub-category line. It was confusing for shelvers and library patrons. So now if a book has different types of animals, the spine label looks like this:

PANIMALS
ANIMALS
JENKINS
rather than:
PANIMALS 
JENKINS

Dropped Multi-Cultural Section
I felt this was an important area to set aside as a resource to share stories outside of our "rural white-bread" Wisconsin experience, emphasis an "I". I thought it might get ignored, but was hopeful people would seek them out. It turned out that our patrons did not check books out from this section as much as they did from some of the other categories. So now, they are on the shelf with the categories that they naturally fit in and will be stumbled upon: friends, family, behavior, stories, etc. This seems really obvious to me now, I'm not sure what I was thinking.

Longer call "numbers"
I had previously used FAVES for my FAVORITES to save space, but it seemed to be counter-intuitive to the whole "do it yourself without codes system" I left the old spine labels as is so we didn't have to buy and print thousands of new labels, but all of our new book spine labels now say: COMMUNITY, FAVORITES, & TRADITIONS instead of COMM, FAVES, and TRADS. All of the call numbers in the catalogs say the entire word, and that is where the patrons look to find where the books are located, problem fixed.

Kid friendly shelf labels
I made picture labels for the subcategories, I am more than happy to forward these on. I did a Google image search of each topic and found the cutest pics I could to put on display! They are just small pictures attached to poster board and covered with Contact Paper, they've been on the shelves almost 9 months and are holding up well.


Other library's adaptations
A few other libraries in our consortium have moved to this scheme over the past year! One of them sent an email out about dropping the P before the main categories.They felt that the colored spines did the trick for them in singling out the books, and I agree they do stick out, I was just worried about finding books on the OPAC.

I had initially planned on genrefying the juvenile chapter books by using colors somehow, which is another reason why I used the P to designate picture books. This project has still not happened as I have been unable to pull together my final vision of how it should look, but it is going to happen some day!

Bottom Line & Final Thoughts:

I would definitely do this again in a heartbeat! It is so much easier for kids to find the types of books they want, and it saves the library staff a ton of reference time.

I REALLY need to add some more princess books and a princess section.  This will just require a commitment. Do princess stories belong in with the Traditional Tales? the Favorites? or the Stories?  Only time will tell....

Jun 26, 2014

Mad Scientists Take One

I had the room organized in a U shape with four tables around a center table. This was an hour program and I had about 25 kids and 4 parents attend. We used the whole hour and I got all of my supplies at the Dollar Store, some I had on hand so I can't give an estimated cost. Maybe around $25-30 because of the milk purchase.

 Experiment One:
I used a few different resources for this one. There were a few YouTube videos and a few blogs that I read and looked at to nail down how I was going to run this in a large group. You can Google "plastic milk experiment" and find tons of different ways it can go.

Supplies:
  • Warm whole milk (I set ours out in the sun all day and it got pretty warm). Some sites recommended a microwave, but that would be hard for a large group, maybe a crock-pot if you are in a pinch.
  • Vinegar
  • Strainer
  • Plastic Cups
  • Tool for stirring
  • Cookie cutters (my co-worker thought to use candy molds, which I think would totally make this project rock in large groups, but after the event)
Prep:
  • Red solo cups with wooden craft sticks in them.
  • Stack of small paper plates with paper towels on them
  • Three large bowls with strainers over the top.
  • Table of cookie cutters laid out.
I started off by giving each kid a red solo cup (insert song in your head here) and a wooden craft stick. 

My lovely assistant and I went around the tables giving each kid a cup of warm whole milk. Then my parent volunteers who attended with their kiddos followed behind us pouring 1 tablespoon of vinegar into their cups.I had them stir for a loooong time. Probably five minutes, some elected to stir longer. After most had been stirring for a while I had them come to the table one at a time and dump their mixture into a strainer over a bowl. When the whey had gone through the strainer, I plopped the "caesin" or curds on their paper towel covered plate.

They had to dry out their caesin with the paper towels, the more dry they got it the better it worked in the molds. After they got "most" of the whey out of their caesin, they patted it flat then used a cookie cutter to make a shape. Picking up the stuff that fell outside the cookie cutter and putting it inside the cookie cutter and patting it down made their shapes more sturdy. I highly recommend using Meagan's idea of a candy mold for the shapes (brilliant!). They left them on the paper plates for later and we moved on to the next experiment. 


Experiment Two:
This experiment can be found all over the internet, just Google "milk soap experiment".


Supplies:
  • What was left of the whole milk (about a gallon)
  • 1/2 Gallon of 2%
  • 1/2 Gallon of 1%
  • Tall container of buttermilk
  • 2 short containers of half and half
  • dish soap
  • Qtips
  • Plastic Shot Glasses from the Dollar Store
  • Plastic trays with sections from the Dollar Store
  • Food Coloring or liquid watercolors (if you haven't discovered these guys yet, they are the bomb!)
Prep:

  • Put about 1/2 inch of soap in the bottom of the shot glasses and stuff a bunch of Qtips in them (those are technical terms). Each kid will need several Qtips, I think I used about 10-12 shot glasses and refilled later as needed. 
  • Label one tray with what type of cow product goes where. Each type of milk should have a spot. 

I gave each kid a tray, then I had parent volunteers (pulled from the hallway) pour their liquid into the designated tray spots. After the milk was poured, I had the kids put drops of food coloring 2-3 per section. They had a hard time not mixing the colors and were sadly disappointed later if they had. After they all have their liquids and coloring, I did one demonstration in the middle on a thick paper plate to show the kids how to "use" their Qtips. After that it was a free for all! 

That was our last project, so the kids could just leave their milk trays on the table and leave, because there was going to be no crying over spilled milk on my watch (ha ha).

May 12, 2014

An a-MOO-zing Storytime

What a fun time was had by all. The books and music worked wonderfully together at two different storytimes!

The Cow who Clucked by Denise Fleming followed by the Laurie Berkner Band's I Know a Chicken with egg shakers.

Moo! by David LaRochelle followed by "the Cows on the Farm" to the tune of Wheels on the Bus with flannel animals.

Dooby Dooby Moo By Doreen Cronin followed by Stuart Stott's song There's a Dog in School. The dog sings the alphabet too: ruff, ruff, ruff, ruff. Followed by a cow and horse. Since the animals were singing in Cronin's book, this is the perfect song to do with the kids afterwards.

Duck on a Bike by David Shannon has a cow in it! and it is on a bike!

Followed by cow shapes and colored bingo dot painters for all.

I did this storytime twice, and it went over well twice. My favorite moment was the two little boys at different storytimes who got the humor of Moo! and were literally laughing out loud!

May 1, 2014

Edible Homeschool Fun

Our final Homeschool club was today and I've been seeing all of the fun Edible Books for National Library Week and decided to try it out with just my Homeschool groups. I told them to create something edible based on one of their favorite books. I was so impressed with the creativity!!


This book was checked out, but I found a YouTube clip of Eric Carle reading the book, and the kids were super excited about listening to him read his own book.
Turkish Delight

The grocery store was out of blueberries!
(I had the same problem)
The 11 year old boy came up with this one by himself. He recited the prophecy from memory when he realized the books were all checked out! It was super impressive, and I love this series.
My attempt at a healthy edible book! Strawberries, (frozen) blueberries, and chocolatey mud!
I set up two tables for the creations to go on. When they were all set up, I presented mine first and read Pete the Cat I Love My White Shoes to the kids. I had the kids warm up to help me sing Pete's song using Jim Gill's Toe, Leg, Knee song. After I read my book, the next kids read their book, too. And the next and the next. I wasn't planning on having them all read their books, but it worked out great. I had just asked them to tell me about their display and talk about the book a little bit. Some of the chapter book kids had to do that, but it worked out for them as well. By the end of the presentation the kids had drifted from the tables to the floor in front of the readers!

This has been one of the most exciting series of programs I've done. Watching some of the kids go from crying at the beginning of the year when s/he presented their all about me posters to reading a book in front of a group of 20 kids was so rewarding. I can't wait to see what next year will bring.

Side note on the Pete the Cat Shoes "cupcakes" for anyone looking for preschool ideas for a 1000 Books Program or other Early Literacy Event idea: 1 1/2 twinkies, and white frosting and about 5 minutes of my time. This would make a great parent/ child activity for preschool aged chidlren. Fine motor for spreading the frosting and talking about what to decorate the shoe with to rehash the story. . . I'm re-using this idea in the future.